Showing posts with label Ply Panels. Show all posts
So everything I've read about has said that carpeting the van is not a difficult job and the carpet from MegaVanMats is very forgiving.  Here's hoping! I figured I'd start with the panel from the tailgate as it was flat and small.  If I made a pig's ear of it, it should be fairly straightforward to remove and start again. Drum roll please....yep, it was as straightforward as I was led to believe, at least on the panel.  Starting inside on the van is still a fairly daunting prospect. The process is:
Spray adhesive (I got high temperature adhesive from MegaVanMats as part of the package) on both the panel and the carpet. It's useful to have somewhere to hang the carpet once it has glue on it and make sure you wear a good mask as the fumes are really not good for you!
Next, after waiting between between one and five minutes, lay the carpet onto the panel, starting at one side and using the roller to ensure there are no air bubbles. If, like me, you don't lay it on straight first time, simply peel it off and start again.
Flip the panel over and mark where you need to cut the carpet so you don't cover the holes when you fold it over. In hindsight, I didn't need to spray the glue right to the edge of the carpet during the first stage as by the time I came to sticking it, I had to use more glue anyway. It also makes it easier for marking if there is no glue on the carpet.
Using a sharp pair of scissors, cut out the excess carpet. You will cut out quite a bit off the corners as you don't want it to overlap when you fold the corners over, otherwise the panel may sit proud of the surface when you put it on.  Don't worry about being neat, no-one will see it and look at mine as an example!
Spray some more glue over the edges of the carpet and the edges of the ply panel. Start folding the edges over. Take your time and use the roller to get a good seal on the glue. Job done! Looks really smart, even if I do say so myself. Next up is to fit the hidden panel clips. As the carpet is so fairly thick, the extra bit of countersink from the panel holes is not noticeable at all, which is a huge worry off my mind!
After a spot of lunch I removed the screws from the piano hinge at the back of the roof bed and then the circlips from the bottom of the gas struts and very carefully labelled them and stored them. I didn't almost lose one - promise. After lifting the roof bed down (heavy and awkward) I could start looking at how I was going to start carpeting. All the advice seemed to be 'It's a two man job'. I'm not two men and Han has enough to do looking after three kids still hyper with Christmas without coming out to spend the afternoon with me. Time to get the thinking cap on. I wanted to carpet in one piece as I like the clean lines. I was going to start on the drivers side as that side will mostly be behind cabinets anyway, so a good side to practice on. I want to carpet the pillars behind the drivers and passengers seats, but don't have a T50 torx bit to remove the seatbelt fittings, so I decided that I would start above the drivers seat and carpet back towards the tailgate. I guessed that the reason it's a two man job was that you need someone to hold the carpet level at the tailgate side, so that when you're glueing it on, it goes on straight. No bother, into the garage I went and grabbed an old Thule roofbar I had lying about. As I had the pop-top open, I was able to balance the bar across the gap and rest the remainder of the carpet on it. So between that, my workbench and some clips, my 'second man' was born.
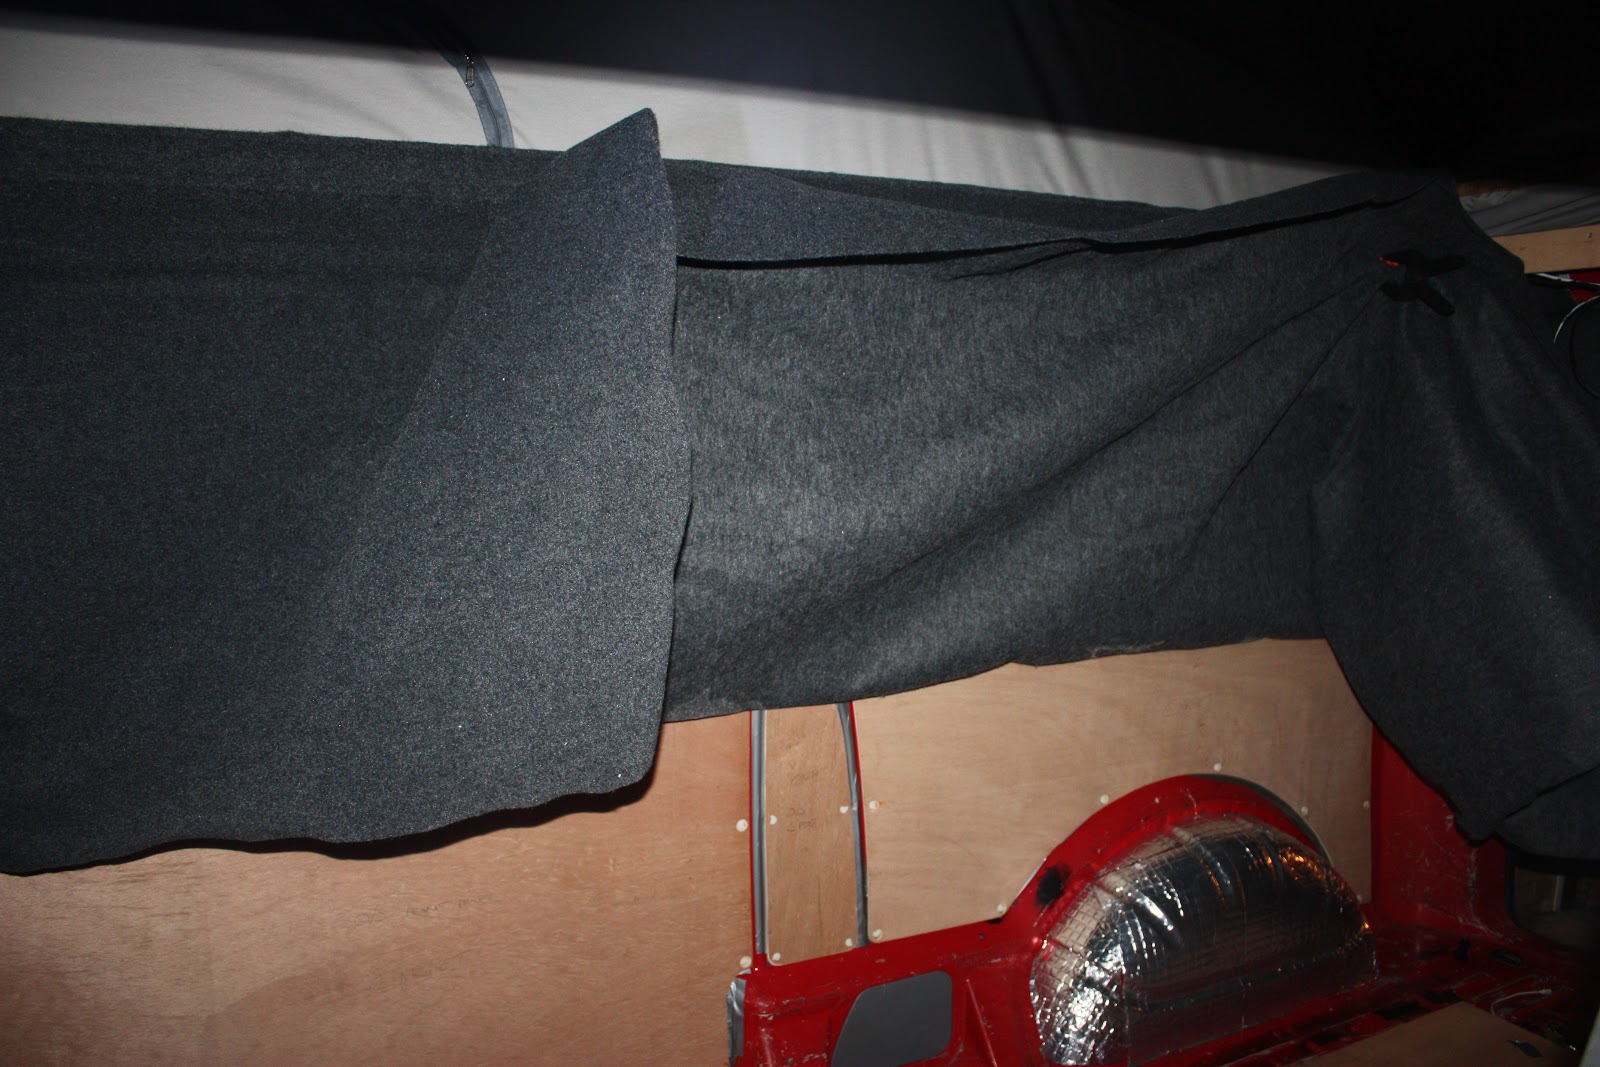
 I pulled the trim loose behind the seat in preparation and started with the underside of the strengthening bar of the pop-top, as it was a long, flat surface. I did the whole length, right back to the tailgate and gave it a good half an hour to get a good bond. Once done, I started on the top of this panel, where the roof bed rests on and then finally the edge where it buts up to the canvas. For this, I had already left a little extra, so I pushed it in, marked where I need to cut and used a sharp stanley knife to cut it.  The, using a shield from some cardboard to protect the canvas, I sprayed both surfaces with glue before pressing in place. It ended up a good finish. The rest of the panel was fairly straightforward. I just took my time and used the roller to get a good bond. The pillar at the driver side, I just followed the same approach as with the pop-top canvas edge. For the top panels, which will be cut out for windows, I didn't bother cutting the carpet. I just covered them and glued up to the edges of the panels. When the guys at Rockinvans cut out the windows, they will cut the carpet and feed it behind the seams for me.

When it came to the wheel arch, there was plenty of stretch in the carpet and although the picture isn't great, the detailing on the arch came out really well. All in, it took me around three hours to carpet this side and it looks spot on.  I'm really pleased with the result.


Well, that's my time run out. 7:15 tomorrow morning I'm on the bus up to the hospital for a hernia operation, with a minimum two weeks led up and six weeks with no heavy lifting. Can't say I'm looking forward to it, but needs must. It is going to be hard giving up working on the van as I seem to have been at it fairly constant over the last couple of weeks. Maybe I can teach my eldest how to carpet and he can do it while I'm laid up, before he goes back to school?
I had my three little helpers today. I say helpers, but they were more interested in bringing all their pillows down for an impromptu den in the pop-top. It was all fun and games until I felt dripping on my head from above when a bottle of water was knocked over! Kids movie time methinks.

Kids settled, it was time to get on with the last of the insulation and sound deadening and the myriad other little jobs prior to starting the carpeting tomorrow, my last day before going in for surgery. First things first - wire up the power for the reversing camera. I've already run the cables from the wiring loom behind the nearside rear light cluster up into the tailgate.  I used a scotchlok tap connector to connect the live to the reversing cable live, the Green and Black cable in pin three of the loom (not the slightly confusing Black and Green!) The Haynes manual has the electrical diagrams so you can check your model to verify. The negative cable I fed up to earth point on the panel above the loom.  I ran the AV cable down to bottom of the C panel and took a nick off the plastic trim to feed it out into the van.  The plan is to run it under the side step of the sliding door and the passenger door before it goes up into the dash behind the radio. Once the wiring was done and duct taped in place, the last bit of ThermaWrap was taped in and holes punched for the clips. The panels were countersunk the requisite 2mm and the hidden clips fitted, before finally, with prodigious use of the rubber mallet, the ply panels were fitted to the nearside panels.
Before Christmas I got a call from Callum at Rockinvans, who fitted our roof and will be fitting the bed, windows and electrics in January. He had phoned as he knew I was carpeting the van over Christmas and just wanted to suggest I run some two core cable up to the shelf above the drivers seat before carpeting, which could be used for some USB charge points up there.  Cracking idea - wish I'd come up with it myself.  I'd enough cable left from the reversing camera wiring, so I popped the pillar trims off slightly and ran the cable up.  I've just left it coiled under the drivers seat at the minute until it's needed.
That's it for today.  We've a couple of folks coming round for a Christmas Soiree this afternoon so work on the van is cut short, but I'm pleased with the progress. I've one more day left before my enforced break so if I get one side carpeted tomorrow I'll be well happy.
Back in the van this morning, first job was to fit the sound deadening and insulation to the tailgate now that the wiring has been done for the reversing camera.  I also finished insulating the sliding door and the rest of the near side panels. I followed the same approach as before, cutting the foam insulation to the size of the panel and then cutting it up into smaller pieces to fit it, before finishing it off with wedges of foam and duct tape.
The ThermaWrap was cut to size and taped on with duct tape, punching holes through for the panel clips. I changed the approach for the tailgate. As I'm going to be removing the panel in the future to allow for fitting the reversing camera, I decided to glue the ThermaWrap to the back of the ply panel, which I will then carpet, so the whole thing will come off as one piece. I'm going to carpet the tailgate too as I like the finish of the carpet, rather than leaving it painted with just the panel carpeted.
While finishing the insulating and looking at the two threaded inserts, I figured I'd need to add a pull handle as Han is only 5'4 and won't reach up to close the door without it.  I'm not sure when I'll get the part, so I just want to cut the ply panel in the meantime to accept the bolts to fit it when I do. I'll just carpet over it and cut the carpet when I get the part.  I just used a couple of strings to transpose the positions of the inserts to the ply panel and cut the holes out. Job done and ready for tomorrow.
OK, no birthdays today, so straight back out for an early start on the van. First off - figure out how the router works. Now normally I steer clear of instruction manuals cause I is a manly man and we don't need none...grrrr, but seeing as a router has a big sharp thing spinning round really fast ready to chew up and devour anything it even looks at, I figured the manual was a good bet. Health and Safety out of the way, I set up the first panel ready to go.
And then I took a step back and had a think. I'm aiming for the finish on the lining carpet to be as smooth as possible, so I needed the countersink holes to be right first time every time. I needed to mark a 20mm countersink around each hole, with the hole dead centre.  To mark the panels up, I ended up using a nut and bolt threaded through an old bearing I had from one of the kids scooters, which gave a perfect marker.
This made really quick work of the marking up and countersinking didn't take much longer as the router was preset to 2mm. A quick skim within each hole with a sharp chisel helped to smooth the way for getting the panel clips fitted and before long, voila - the next panel was in place and looking good.
The next step is to finish the insulating on this side and add the last panel. It's Christmas Eve tomorrow and we're off to see the new Star Wars with the kids, so won't be back in the van for a few days. Insulating was same as before and fairly straightforward. The only difference this time was I had to unscrew the wiring loom holder to fit the insulation right up to the tailgate. A torx bit is needed for this, but there is loads of play in the wires to lift it right out of the way without actually disconnecting any of the electrics. Insulation done, panels countersunk, clips fitted and panel hammered on with the trusty rubber mallet. That's one whole side done, ready for carpeting.

Next job was to fit the wiring for a reversing camera. This is something I've been thinking about for a few days and although I haven't definitely decided to go for a camera, I wanted the option. I've already decided to carpet in one piece, rather than carpeting the panels as I want the cleaner look, so removing the panels in the future to wire a camera up will be a pain. I took a drive up to a local auto electrician and picked up enough AV cable and two core cable to fit the camera, the plan being to put the wiring in place so it's there if I decide to go ahead with it. Sounds a fairly straightforward job doesn't it? I had ordered a Haynes manual a couple of weeks ago, so I already knew which wire on the loom was going to the reversing light (Green and Black, pin 3 in the loom). I'll tackle the actual wiring into the loom after Christmas. Next up is getting the wires into the tailgate. Again - I've already the panels off and can see where the existing wiring is routed, so not a problem. A trusty wire coat hanger will be my friend today. I went out to the van after dinner, planning to slip these wires in and then start insulating the sliding door. Hah! Three and a half hours later and I finally got the wires through to the tailgate.
Those wires that go straight up to the to the top of the back panel?  Nope, those aren't the ones you need to follow. You need to go about halfway up, then take a 90 degree turn towards the back of the van and in behind that panel (if you're hands are thin enough to get in there), you can feel another gap. Feed the wires up through that gap. Next up, look to the top of the van, to the crossbeam and you'll see a white plastic trim, about 6" long. It sits behind the rubber hose that the loom goes through to get into the tailgate.  Pop that trim off and feed your wires up to there. Pull through enough cable to get you all the way into the tailgate back into the van. Take a breath!
OK,next job is to get it through that rubber hose. Car manufacturers, those kind hearted generous types, they of course have left enough room to fit another two small cables through easily. Mmm... if only. This bit was probably the hardest bit and took a lot of forcing through with the wire coat hangar and not a small amount of swearing. Once through this though, the last bit, passing through the tailgate panel, was a doddle. After three hours of blood sweat and tears, I'm definitely now going to fit that reversing camera. No way I went through that for no reason!

OK, that's enough for today. We're off to see the new Star Wars with the boys tomorrow, so there will be nothing done on the van for the next few days. I reckon I've two, maybe three days left of work before I go in for surgery, so the chances of getting finished before then are slim. No worries - it's Christmas :-D
Now, where's that mulled wine?


Tonight I had my first meal in the van, albeit, it was on the driveway outside the house and I was surrounded in insulation cut offs! Hard to beat one of Han's curries and what better than a pint of the black stuff to christen the van.


This morning I finished off the sound deadening, all except the nearside wheel arch, which has the mount for the jack on it. I need to take this off first, but luckily, a quick call to a mate with an angle grinder, means that will be coming off tomorrow. After that, I went over all the bare metal I could find from old screw holes and mounting points with some hammerite, to protect against rust in the future. Once that was done, it was time to get on with the insulation.

I'm using 25mm Quinn Therm insulation in the panels, covered by ThermaWrap, which is essentially just foil covered bubble wrap. For the foam insulation, I found the easiest way to do it was to measure out and cut a piece which would cover the entire panel, then to cut this piece into pieces so I could fit it in, one at a time. I then used thin wedges of insulation to hold the insulation in place by forcing it against the sides of the panels. This seemed to hold really well, but I followed up with duct taping the seams as an extra backup measure, which works well at holding the wedges in place. Once this was done, I cut the
ThermaWrap to the size of the panel and fixed it on using more duct tape. This should hopefully aid in giving a waterproof seal, to prevent any water getting into the panels. I had to punch holes in the tape for the mounting holes for the panel clips. Talking of panel clips. I ordered the hidden clips from MegaVanMats, along with my carpet as I wanted the carpeting to be as smooth as possible. I knew the panels had to be 3.6mm ply in order for these to fit. Before I picked up the van, I asked Callum at Rockinvans of he could supply 3.6mm panels for me, which he could and I duly picked up with the van.

Pleased with my progress so far, I went and grabbed the first two panels and the clips, with the intention of fitting them this evening, before finishing for the day. The first panel I did was the small center panel. Five minutes later, all five panel clips where in place. The easiest way I found to attach the clips was to use a pair of pliers to grip the tree part of the clip and to twist them in from underneath. A couple of taps on each clip with a rubber mallet and the panel was in place. Man this was going way better than I thought, I'm flying through this project!


On to panel number two. Out came the trusty pliers, grabbed a panel clip, twist....twist harder....twist harder still...SNAP! Hmmm, maybe a faulty clip.  Try number two. Twist...twist harder...no dice.  Sitting back for a minute it suddenly dawned on me. I grabbed the measuring tape and sure enough, it's 6mm ply - too big for the clips. Quickly checking the rest of the panels, they're all 6mm except for the small center panels. B*#%*R!! The whole idea of having the panels pre-cut for me was to save time. I don't fancy having to cut them all out anyway, even though I can use these panels as templates. A job for tomorrow methinks.